CLASS NOTES:
CG130 Drawing & Design Fundamentals


PERSPECTIVE
 
 
OVERVIEW:


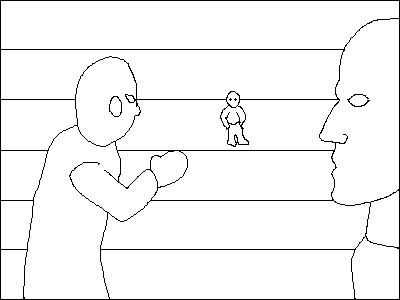
Perspective shows how parallel lines converge in order to give the illusion of depth and distance. Like many of the concepts you are becoming familiar with, perspective also comes in three general categories: 1 point perspective, 2 point perspective and 3 point perspective. Before we get into each individual case however, we will start by getting a feel for the Horizon Line (or Eye Level) and some ideas on why to choose a particular one for your design.


What you choose to emphasize in your design will play a vital role in determining which eye level you will pick for the work.

If the area of emphasis is on the ground, you will want to raise the eye level as in the example.

If it is something in the air then a lower eye level which features more of the sky is called for.


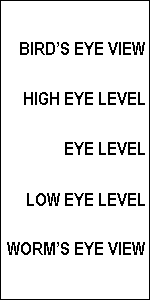
The Horizon Line is the physical representation of your viewer's Eye Level. A Birds-Eye View will have your viewer looking down upon your elements while a High Eye Level will feature the ground plane as dominant. The center Eye Level deemphasizes both planes so that neither is dominant and the focus shifts to the elements themselves, so unless you have an actual reason to use it, don't. The Low Eye Level implies you are looking up at the sky and the Worm's Eye View places your viewer beneath the objects looking up at an extreme angle.

The Bird's Eye and Worm's Eye Views are extreme and are used most often with 3 Point Perspective, so if you are not using 3 Point, then choose a horizon line which is comforably between either of these views.


1 POINT PERSPECTIVE:


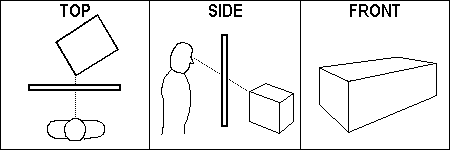
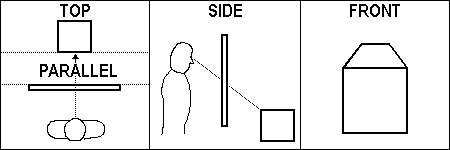
1 Point Perspective is all about the flat face of an object heading into or coming out of the
Picture Plane. It is often called Parallel Perspective because the face of the object is parallel
to the Picture Plane. (See the views below if this is confusing.)
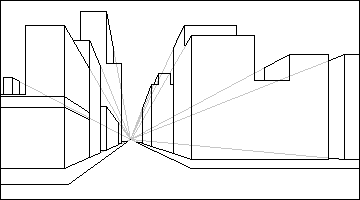
All lines are perfectly vertical, perfectly horizontal, or recede to the Vanishing Point. What is a Vanishing point you ask? If you have ever stood on train tracks and looked as they head off into the distance, the rails appear to get closer and closer to one another until they finally meet. We know logically that the rails cannot actually meet or the train could not use them, but the visual effect over distance is that they do. The point at which they meet is called the Vanishing Point. Noptice how all non-vertical non-horizontal lines go to the Vanishing Point in the image below.
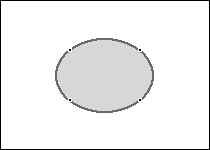
Rule of thumb on Distortion in 1 Point Perspective. To avoid distortion,
create an ellipse connecting the 4 points of Petruvius's Golden Mean and
make sure the Horizon Line and the Vanishing point are both within the ellipse.
Lastly, if you want to make learning 1 Point Perspective easier, nail the face down first. Once you have the face of an object it will be more apparent which corners go to the Vanishing Point.
   
 
2 POINT PERSPECTIVE:


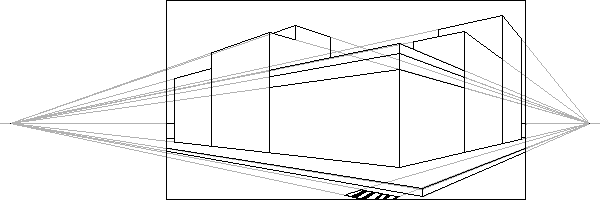
2 Point Perspective is about the edge of an object facting the Picture Frame. It is also known as Oblique Perspective since the faces of the object are oblique to the Picture Frame. Two faces of the object are shown, so make sure that one is Dominant.

Where 1 Point Perspective was about moving into or out of the Picture Plane,
2 Point is about movement to the left or right within the Picture Plane.

Placement of the leading edge and the vanishing points are crucial to eliminating any distortion when creating your Design. One Vanishing Point will be nearer to your leading edge than the other. The featured side of the object will be the one with the Vanishing Point furthest away. Referring to the ellipse made with the four points of the Golden Mean, the leading edge must be touching or comfortably inside of the ellipse to avoid distortion. Additionally, the distance from the leading edge to the furthest Vanishing Point should be set at a minimum of twice the distance from the edge to the nearest Vanishing Point. Distortion becomes evident when the angle formed by the lines to the Vanishing Points from either end of the leading edge is less than 90 degrees.

(Note: Angles less than 90 degrees indicate that the Design calls for 3 point perspective.)


3 POINT PERSPECTIVE:


3 Point Perspective is is used if an edge is either too high or too low with respects to the Horizon Line and represents movement up or down (extreme height, or extreme depth). The main feature of 3 Point Perspective is a corner which will connect out to the Vanishing Point Left (VPL), Vanishing Point Right (VPR) and the Vertical Vanishing Point (VVP). The third Vanishing Point should not be in the exact middle, and should not be directly above or below the featured point.

Be comfortable with 2 Point Perspective before you choose to learn and practice 3 Point.


BACK